
Defender for Endpoint base configuration
This post is a part of a series where my plan is to focus on the implementation and operation of Defender for Endpoint.
The product
Extended detection and response (XDR) is the intentional purpose of Microsoft Defender for Endpoint. Meanwhile it can do a lot more and offers industry leading security capabilities powered through the cloud.
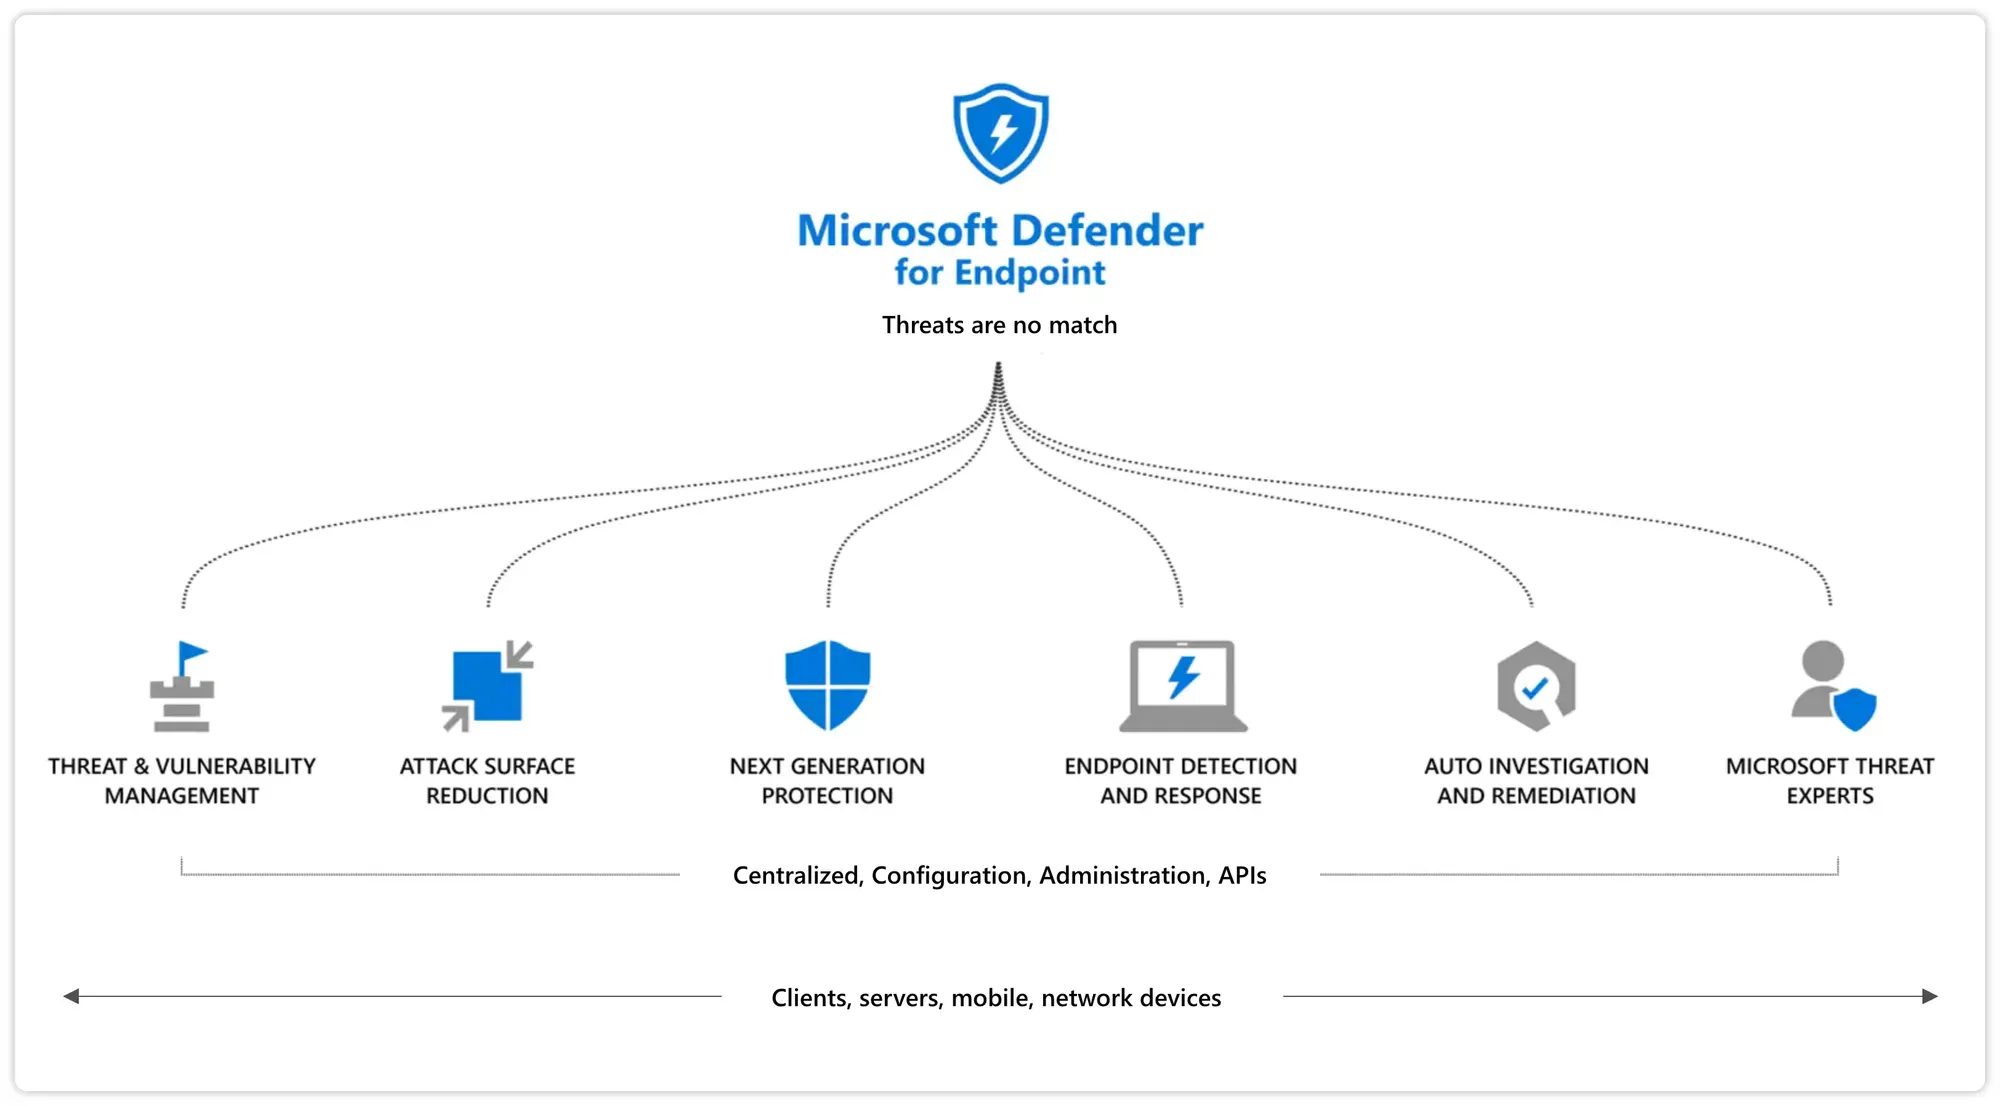
At this point we need to differentiate between only the Microsoft Defender and the Microsoft Defender for Endpoint:
- Microsoft Defender - is the Windows built-in anti-virus.
- Microsoft Defender for Endpoint - the extra licensed product on top of Microsoft Defender for advanced enterprise security.
Please take a look at my review of both of these products and their central features. The content described in the following is about the configuration options of Defender for Endpoint, how to get started and my personal input.
Configuration
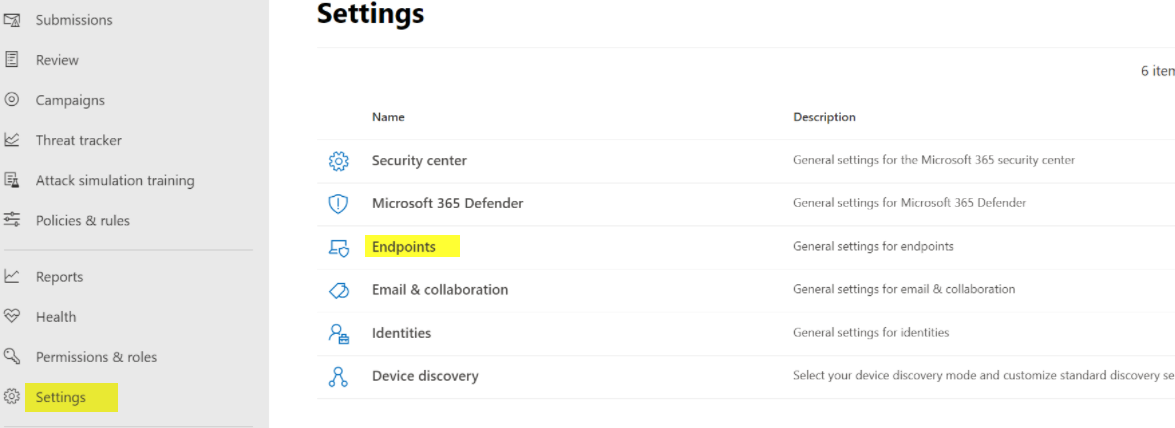
Portals
Microsoft moved everything about security to Microsoft 365 Defender portal. Originally there was a dedicated Security center for Windows Defender for Endpoint. You can utilize both of them, as they provide similar functionalities. Although I would urge you to use the state of the art, which is Microsoft 365 Defender.
Settings - Endpoints
Now all the configuration options are found under settings, at the left. Here you can see the different Defender products. We click on Endpoints.
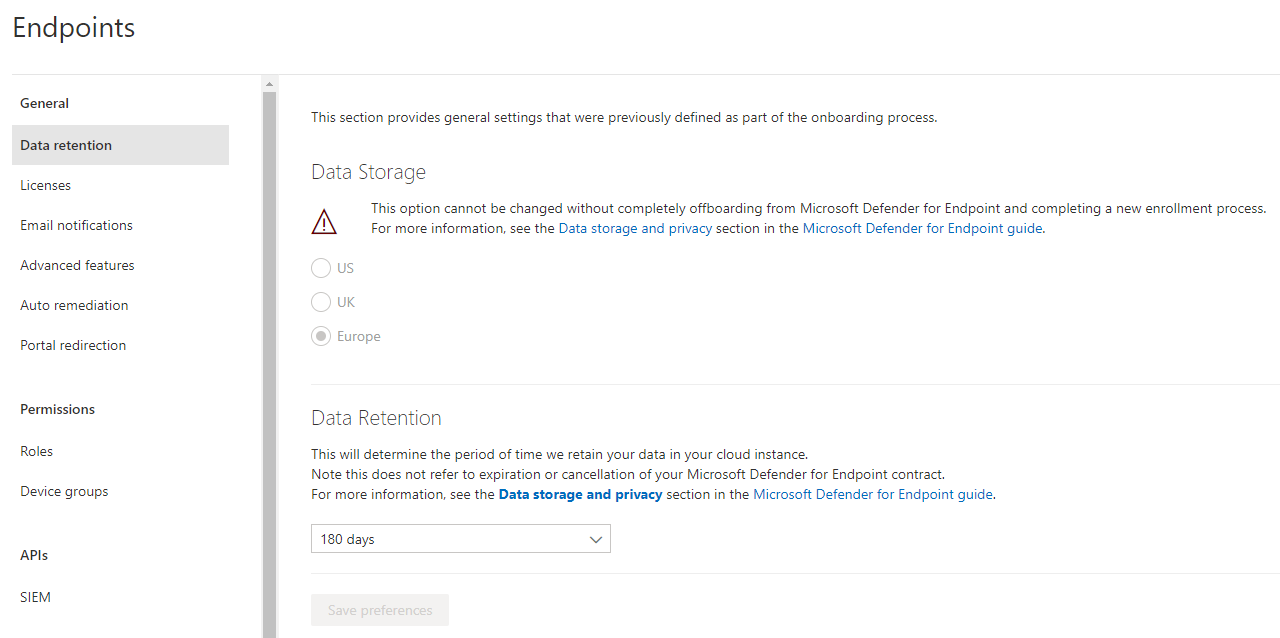
Data retention
The data retention regulates the time span, to days in the past, for which your data is available to you. I would set this as long as possible. Furthermore the data location is also set here and only configurable when the product hasn't any endpoints onboarded at that particular time.
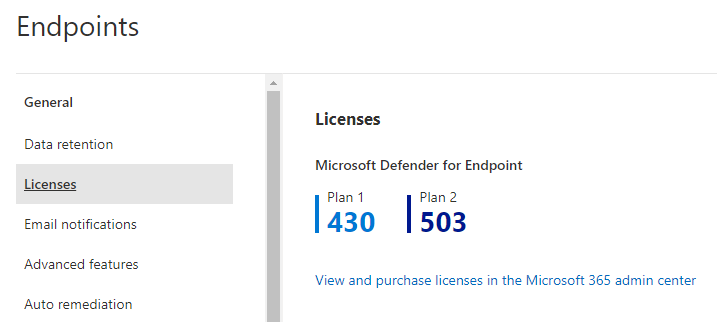
Licenses
Next, we can see the Plan 1 and 2 licenses in your tenant. This shows to you how many users or devices are permitted for the corresponding functionalities.
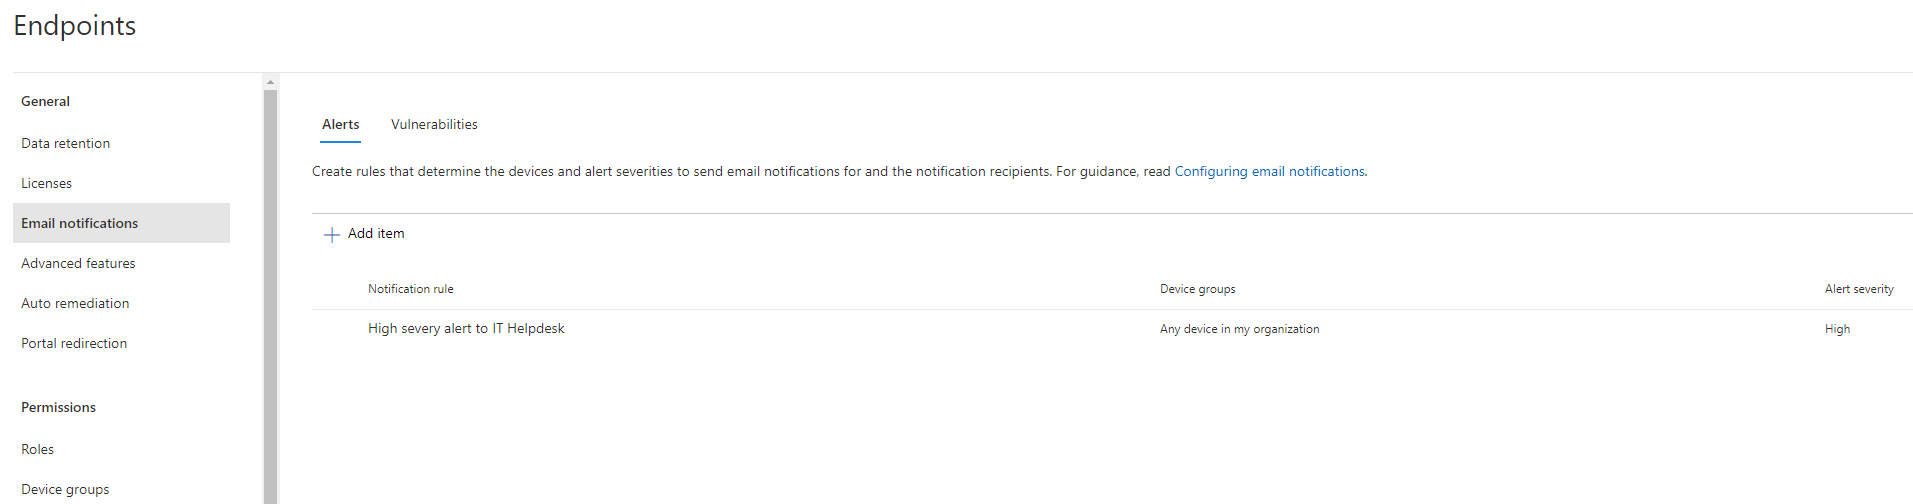
Email notifications
The email notification does exactly what the name says. It can send mails when events of new alerts or vulnerabilities occur. It is also possible to define which severity level triggers a notification and for which device groups this occurs.
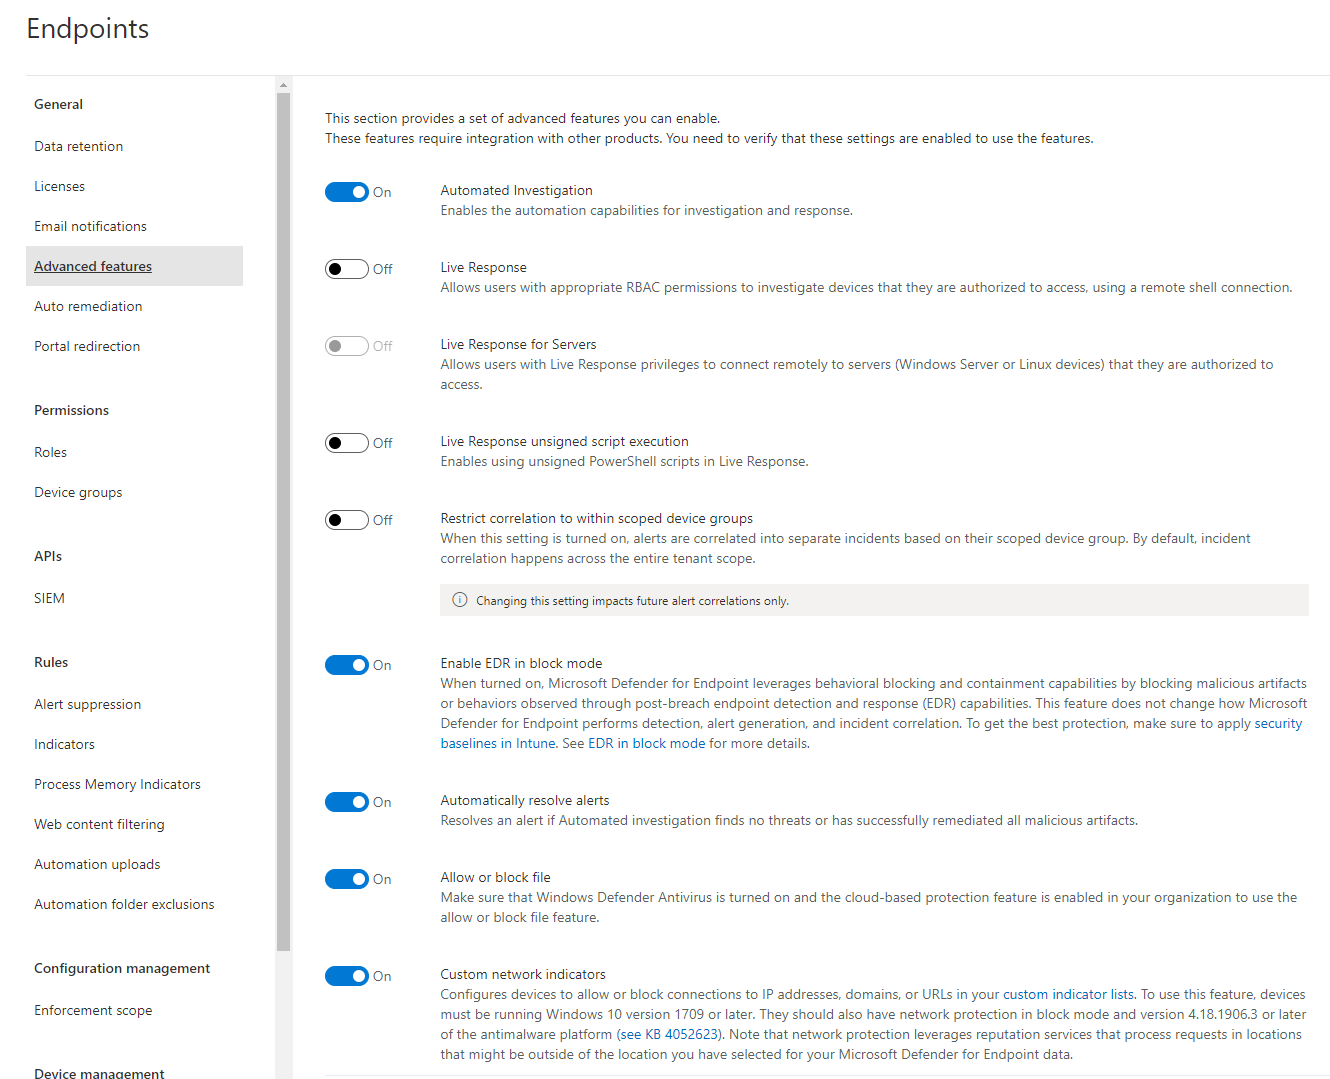
Advanced features
The real configuration happens in the advanced features. I will give a short explanation on the settings in here:
- Automated investigation - enable or disable any automated actions by Defender for Endpoint globally
- Live response - when a device could possible be contaminated, you may want to do some manual investigation through a remote shell. You can also differentiate between servers and allow to use unsigned Powershell scripts.
- Restrict correlation to within scoped device groups - at some point you have different device groups with different devices. Maybe you don't want to have any correlations in the incidents for them.
- Enable EDR (endpoint detection and response) in block mode - generally this option tends to a more rigorous and restrictive handling of Microsoft Defender for Endpoint. It would block any actions that where fetched by EDR.
- Automatically resolve alerts - if an incident was already automatically resolved by DFE, it would also close the corresponding alert. With this enabled, you wouldn't see any open alerts, when they were already remedied.
- Allow or block file - does prevent or block to manipulate or read files, through DFE
- Custom network indicators - are IP's, domains or URLs that are managed by you to allow, block or audit
- Tamper protection - is a protection to the configurations set in Microsoft Defender for Endpoint and preserves from tampering.
- Show user details - enable or disable anonymization for users that are yielded through DFE portal
- Skype for business integration - can be used to call or mail to the users
- Microsoft Defender for Identity integration - established information exchange with Defender for Identity
- Office 365 Threat Intelligence connection - will also use data from Office 365
- Microsoft Defender for Cloud Apps - integration with Defender for Cloud Apps. With this enabled, the DFE sensor on any device will send data to Defender for Cloud Apps. (use case example: policies, alerts and apps that populate) Read more about Defender for Cloud Apps
- Microsoft Secure Score - use the insights from DFE to be considered in the Microsoft Secure Score
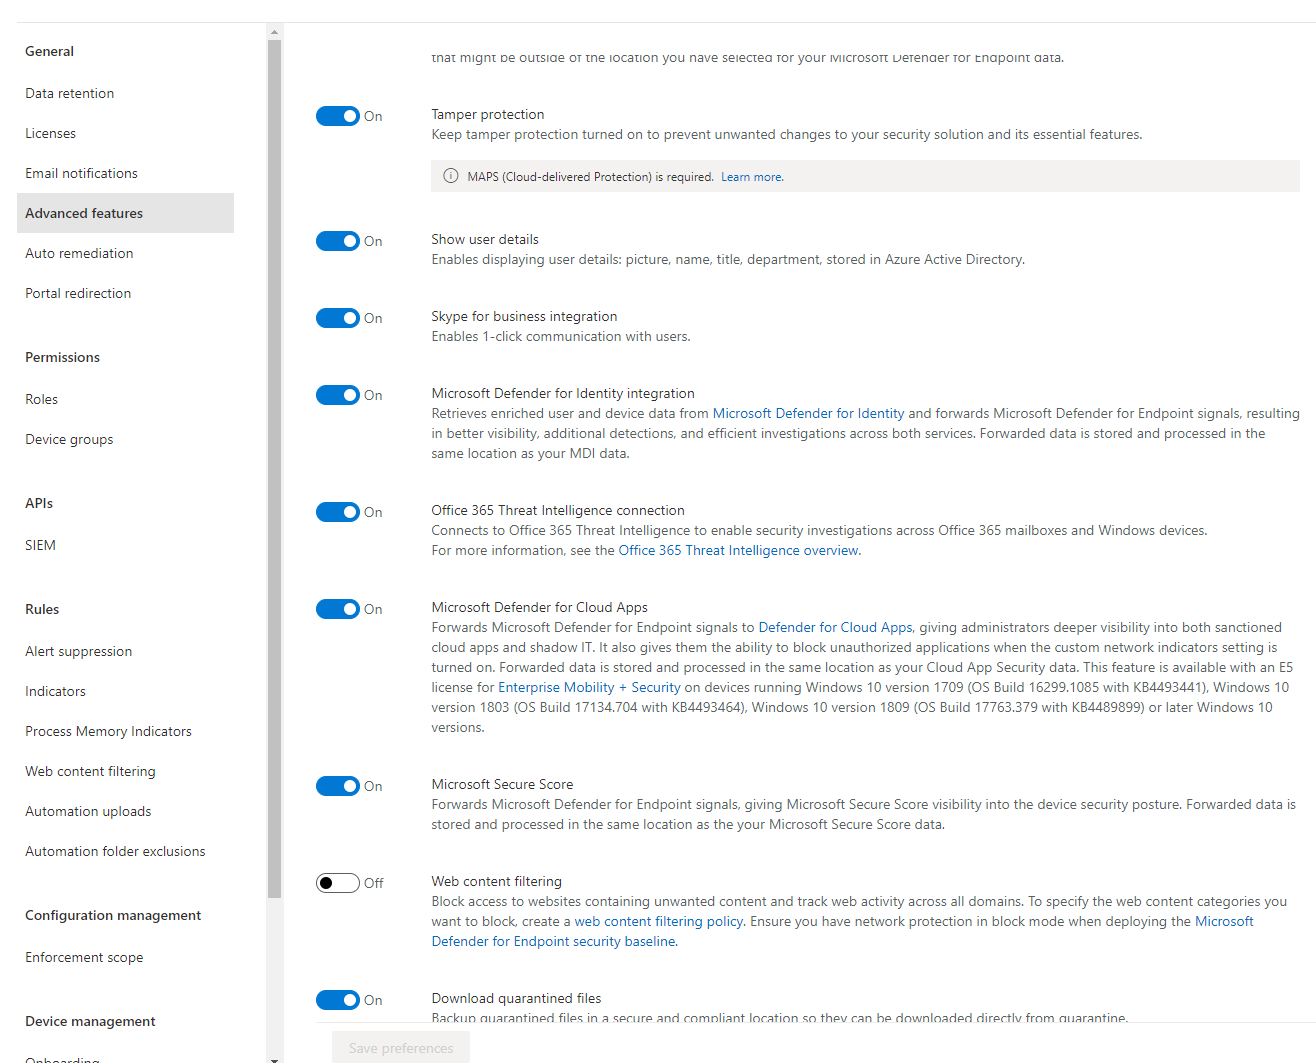
- Web content filtering - blocks access to unwanted content in the web from a device
- Download quarantined files - safe quarantined files in a secure location
- Share endpoint alerts with Microsoft Compliance Center
- Microsoft Intune connection - if you use Intune as MDM, you can perform the onboarding process directly with an Intune configuration profile and use other capabilities Learn more about Intune and MDM
- Device discovery - with this enabled, a device with DFE sensor will act as network scanner and list up any unmanaged or unknown devices in the portal to enhance correlation of events
- Preview features - try new features for the product
Official Microsoft documentation

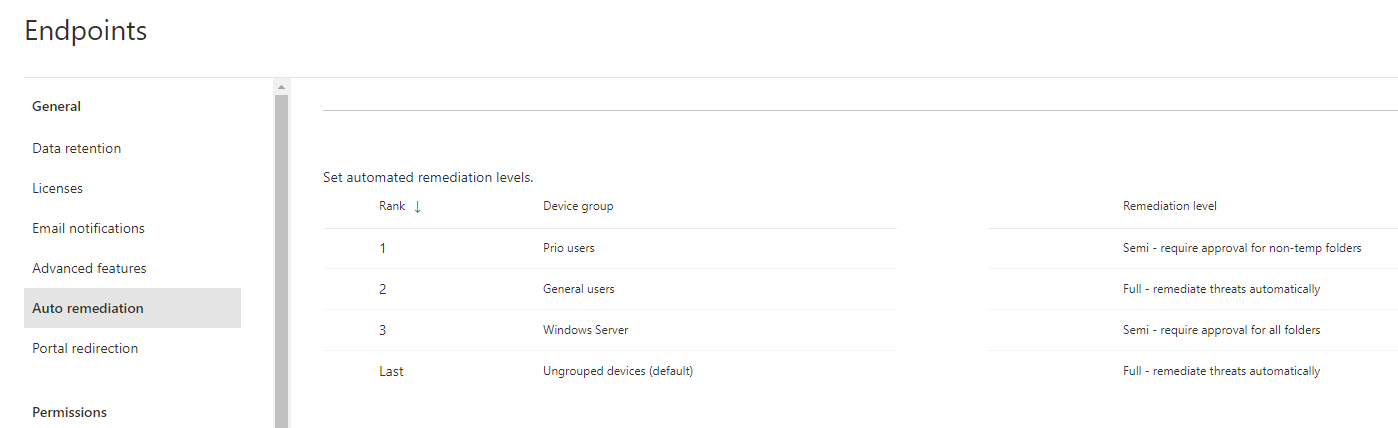
Auto remediation
The auto remediation is based on 5 levels and allows you to have more authority of what Defender for Endpoint does as a remediation action on a device. On the other hand you may want to know when a threat or something suspicious acts on certain devices or device groups. Here you configure the device group and it's remediation level. (please scroll down for the device groups)
- Full - remediate threats automatically (DFE acts autonomous)
- Semi - require approval for core folders (system directories)
- Semi - require approval for non-temp folders (everything but not temp or download directories)
- Semi - require approval for all folders
- No automated response (detection only)
Portal redirection
Everything the portal redirection does, is automatically direct you from securitycenter.windows.com to security.microsoft.com, which is the new page and experience.

Roles
Roles are based on RBAC (role based access control) to granularly regulate permissions within Defender.
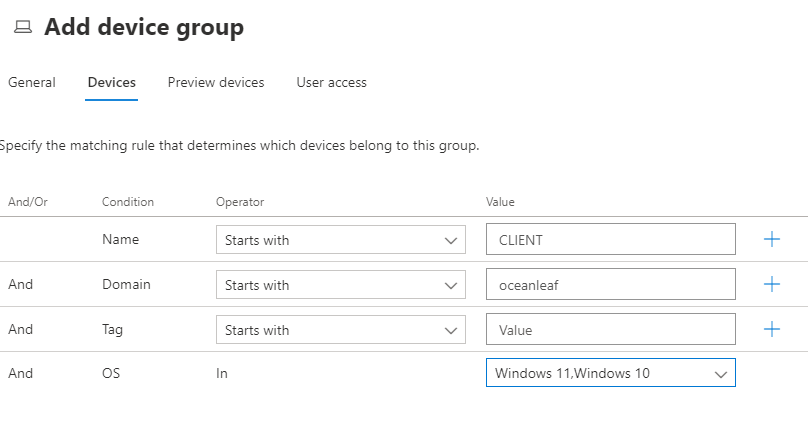
Device groups
Now device groups is definitely a consideration to do. As I already mentioned, you set different remediation levels to them. Based on my experience I would suggest you to separate clients and servers (maybe even OS releases). You may also have special devices which you have to pay utmost attention to. This is an example of some device groups and their remediation levels:
This is how you set conditions and rules for members of the group. It also works with and/or relations. When you click next, there is a preview for the devices that would be in that group.
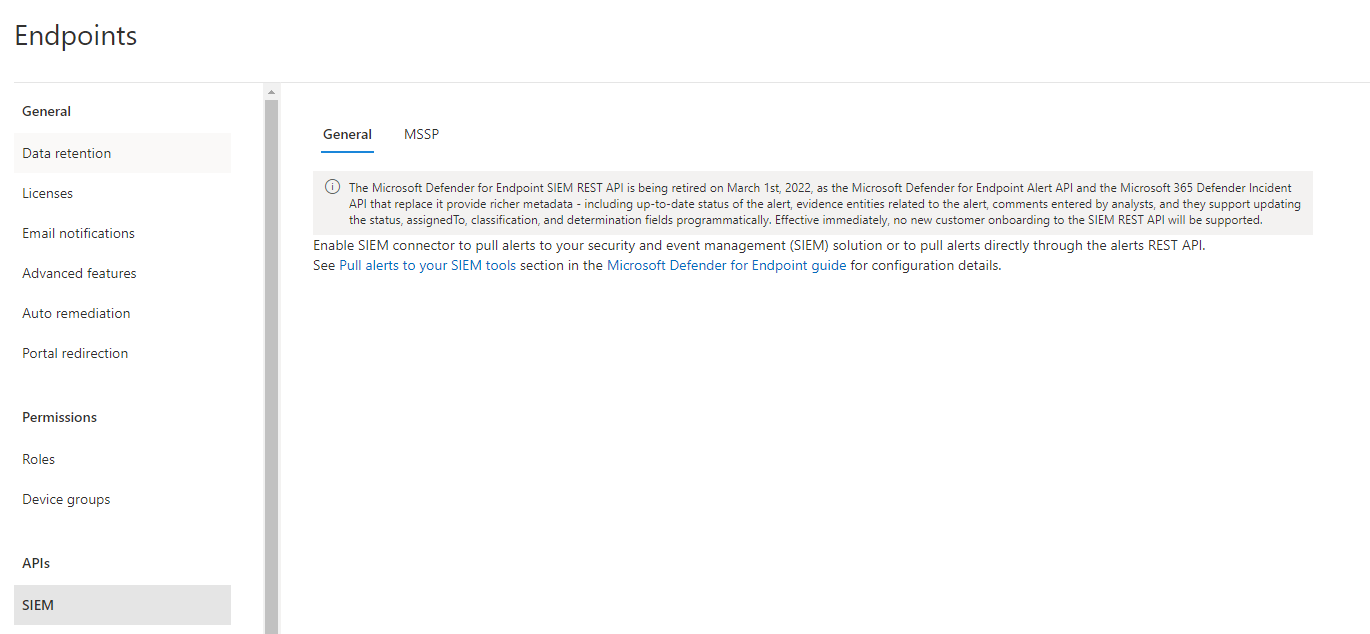
SIEM
Security information and event management (SIEM) integration through RESP API is found here. In general, if looking for a SIEM solution, Azure Sentinel is mostly what is recommended and used.
Alert suppression
Alert suppression are populated by alerts. These alerts can be converted to a suppression rule and for the future you won't receive alerts from this type. I wouldn't consider using this feature, as things will get under the table.
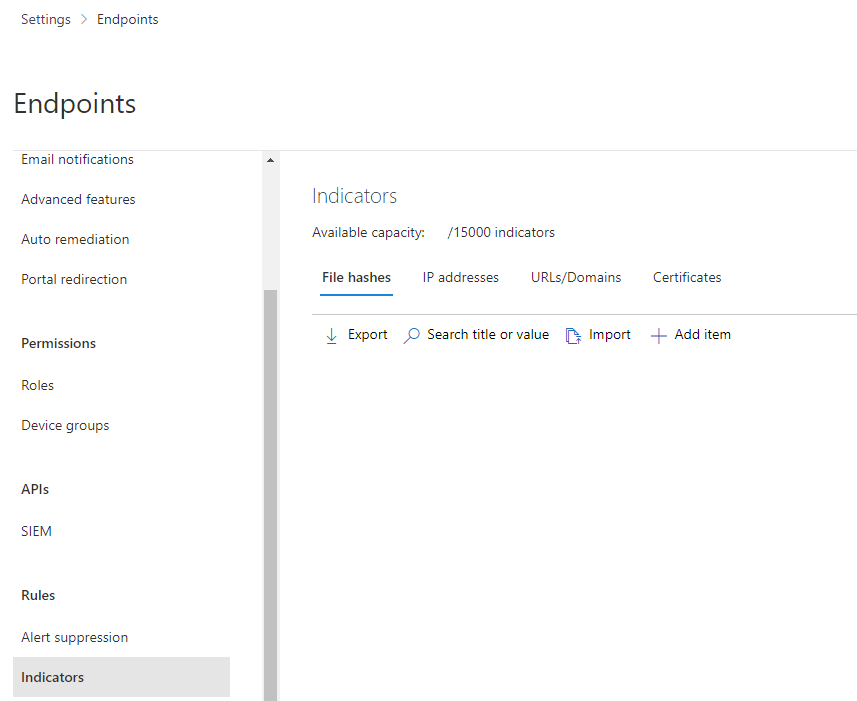
Indicators
Indicators are custom contents found in your environment to be allowed, audited or blocked. Either file hashes, IP addresses, URLs/Domains and certificates are available and up to 15000 indicators. If Defender for Cloud Apps is connected, the unsanctioned apps are also in here.
Let's create such an indicator. I chose a random file hash. What I think is great, is that you can get a rough idea of the distribution in your organization by the statistics at the bottom.
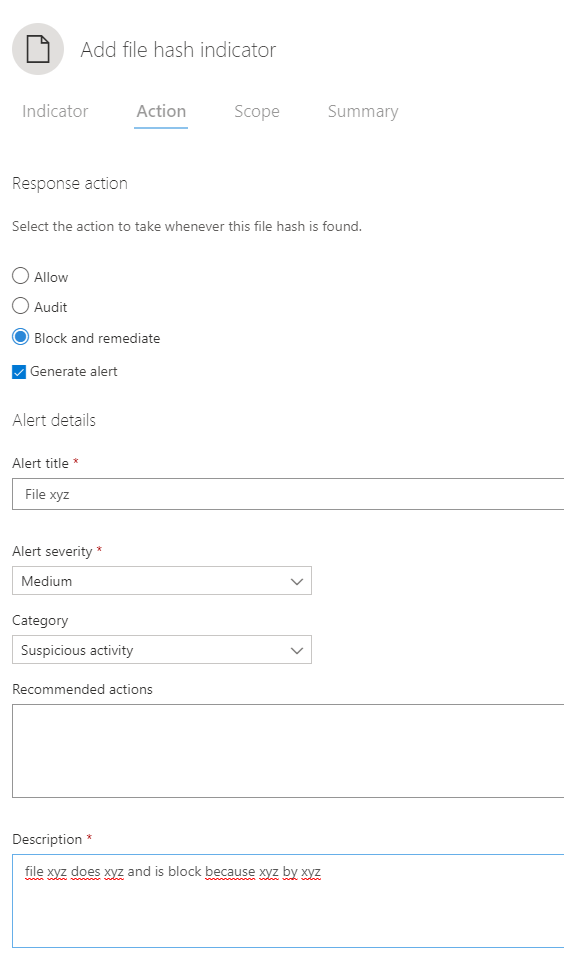
At next, I select the action. In this case I would particularly block and remediate this file and generate an alert out of it. The scope can be refined to a device group or all devices in the organization.
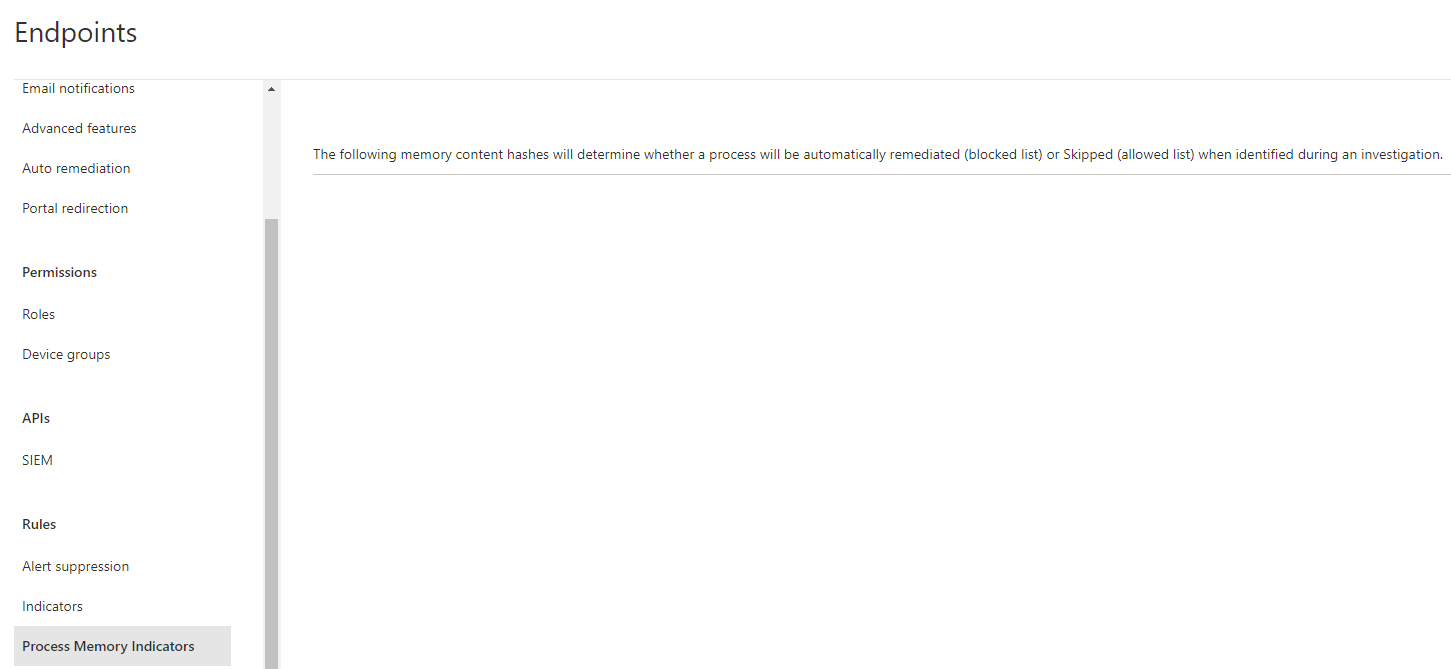
Process Memory Indicators
This are indicators of processes respectively memory content hashes.
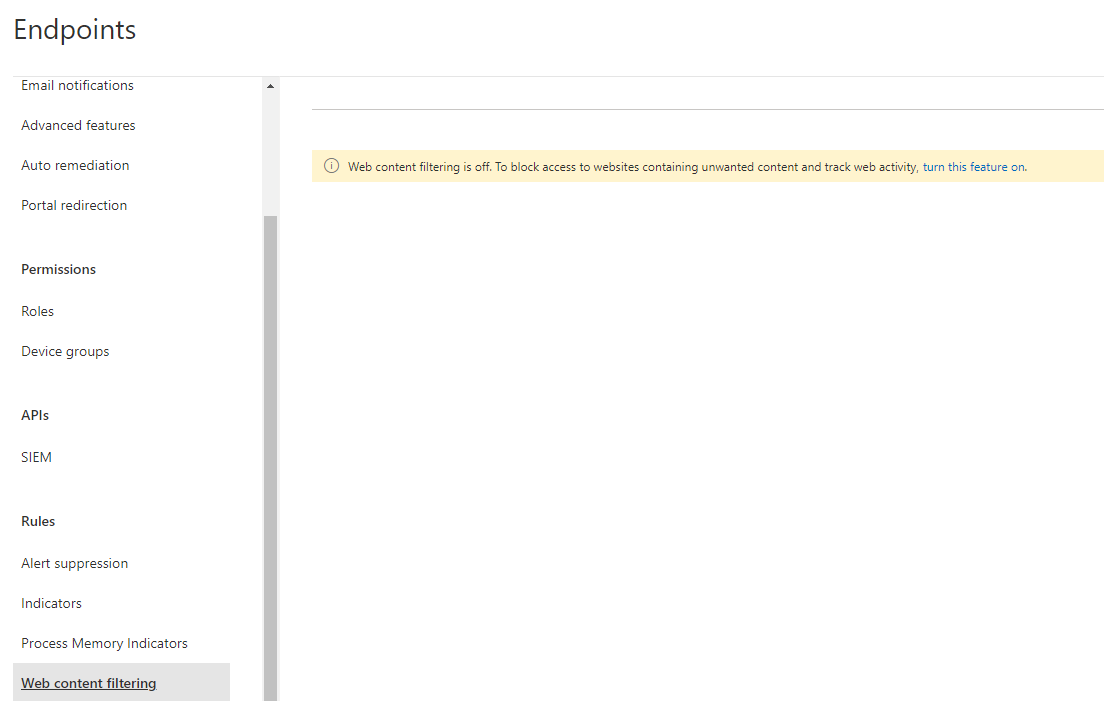
Web content filtering
As already described, web content filtering is a feature to block access to unwanted web content.
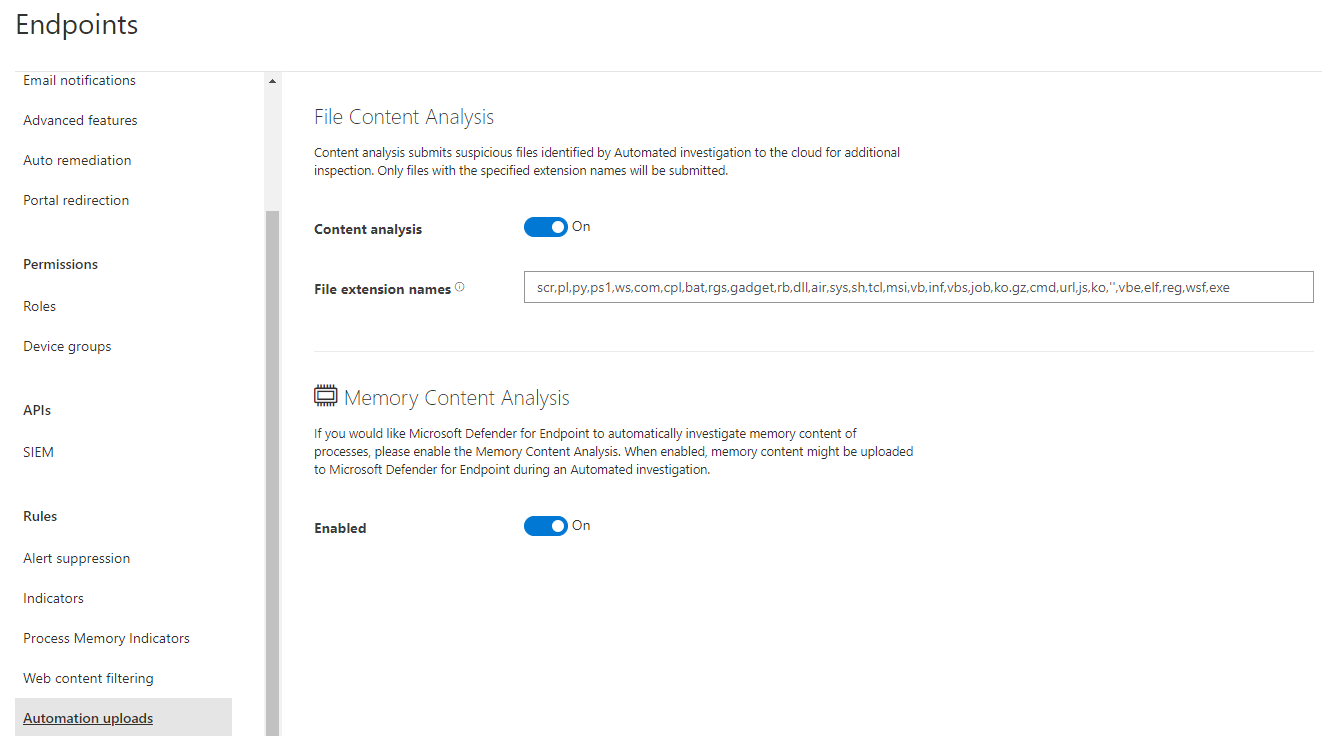
Automation uploads
Uploads are the core of security for further investigation. DFE can analyze file contents of common extension names and memory contents. The extension seen in the image are set by default and should definitely be included.
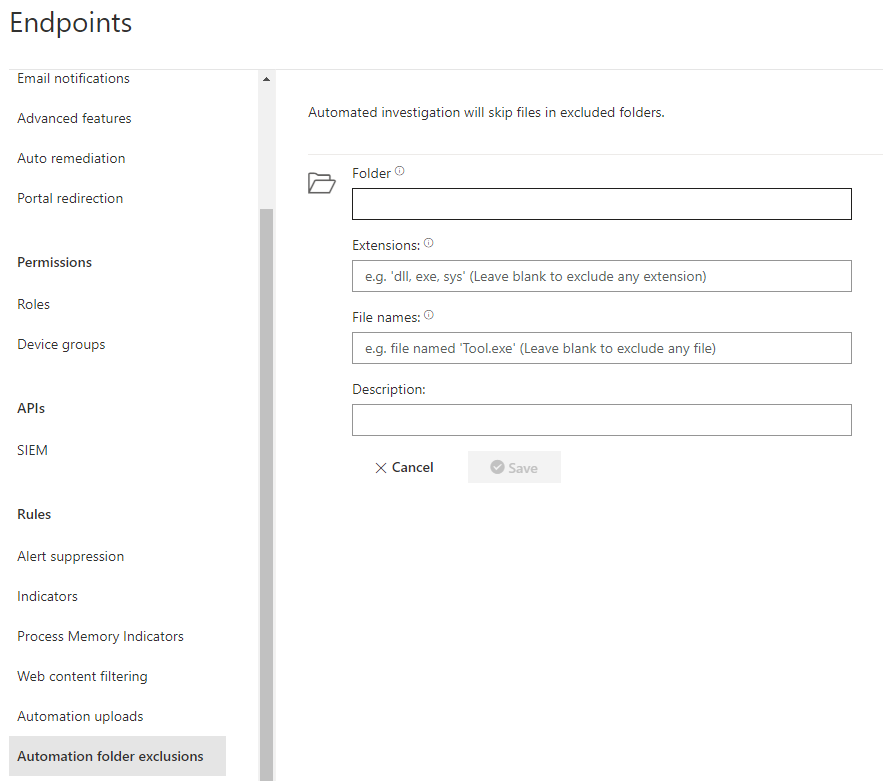
Automation folder exclusions
The exclusions for folders, extensions or files are at this place.
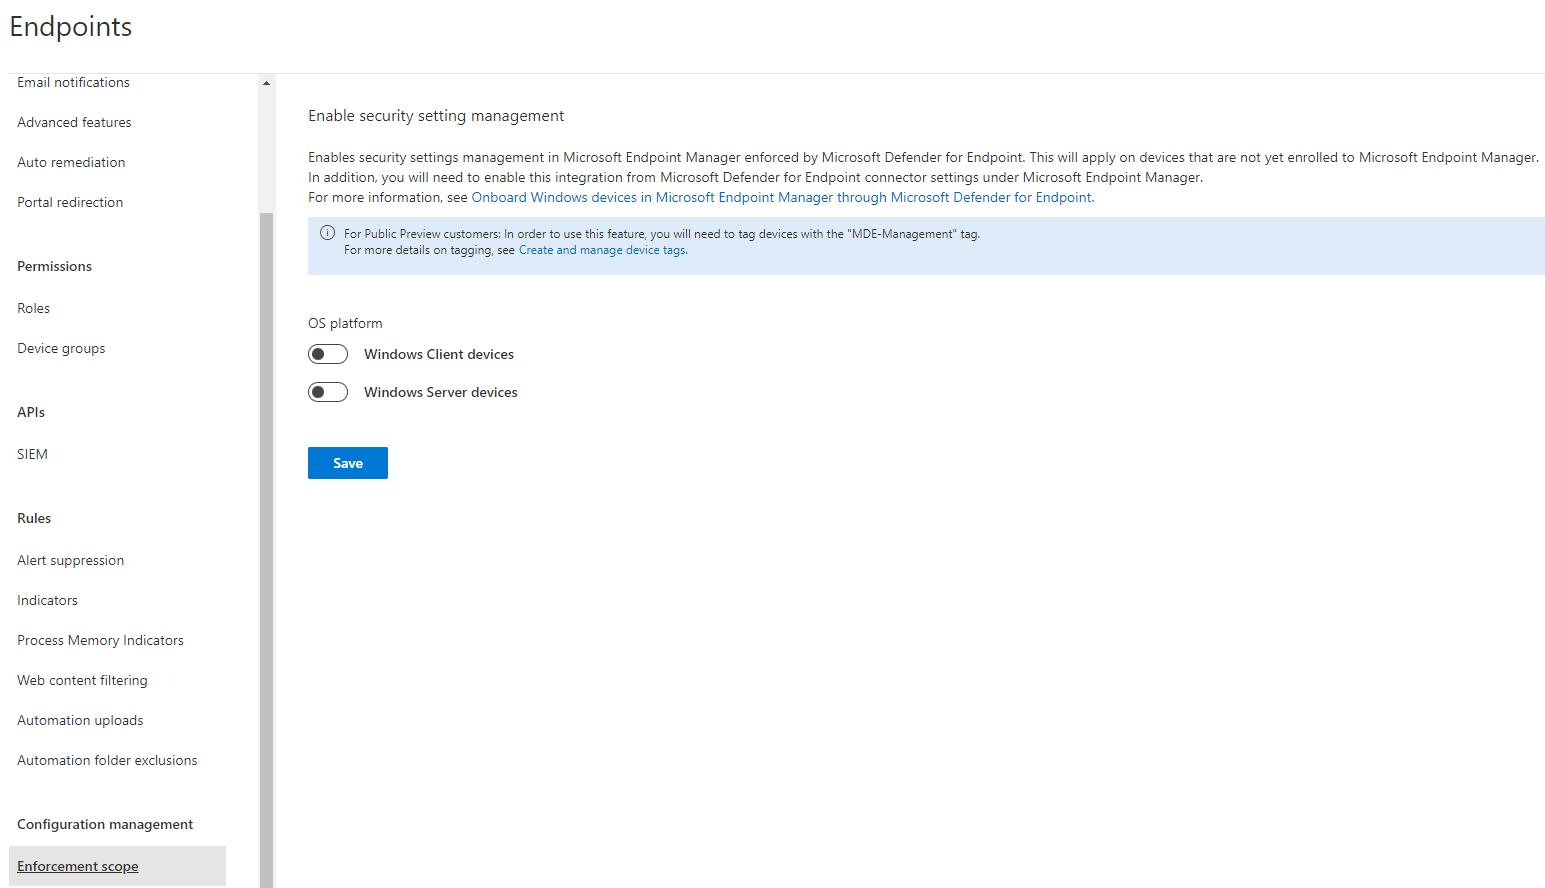
Enforcement scope
With the enforcement scope you could configure settings for unmanaged devices, which are not onboarded to Intune MEM. Official Microsoft docs
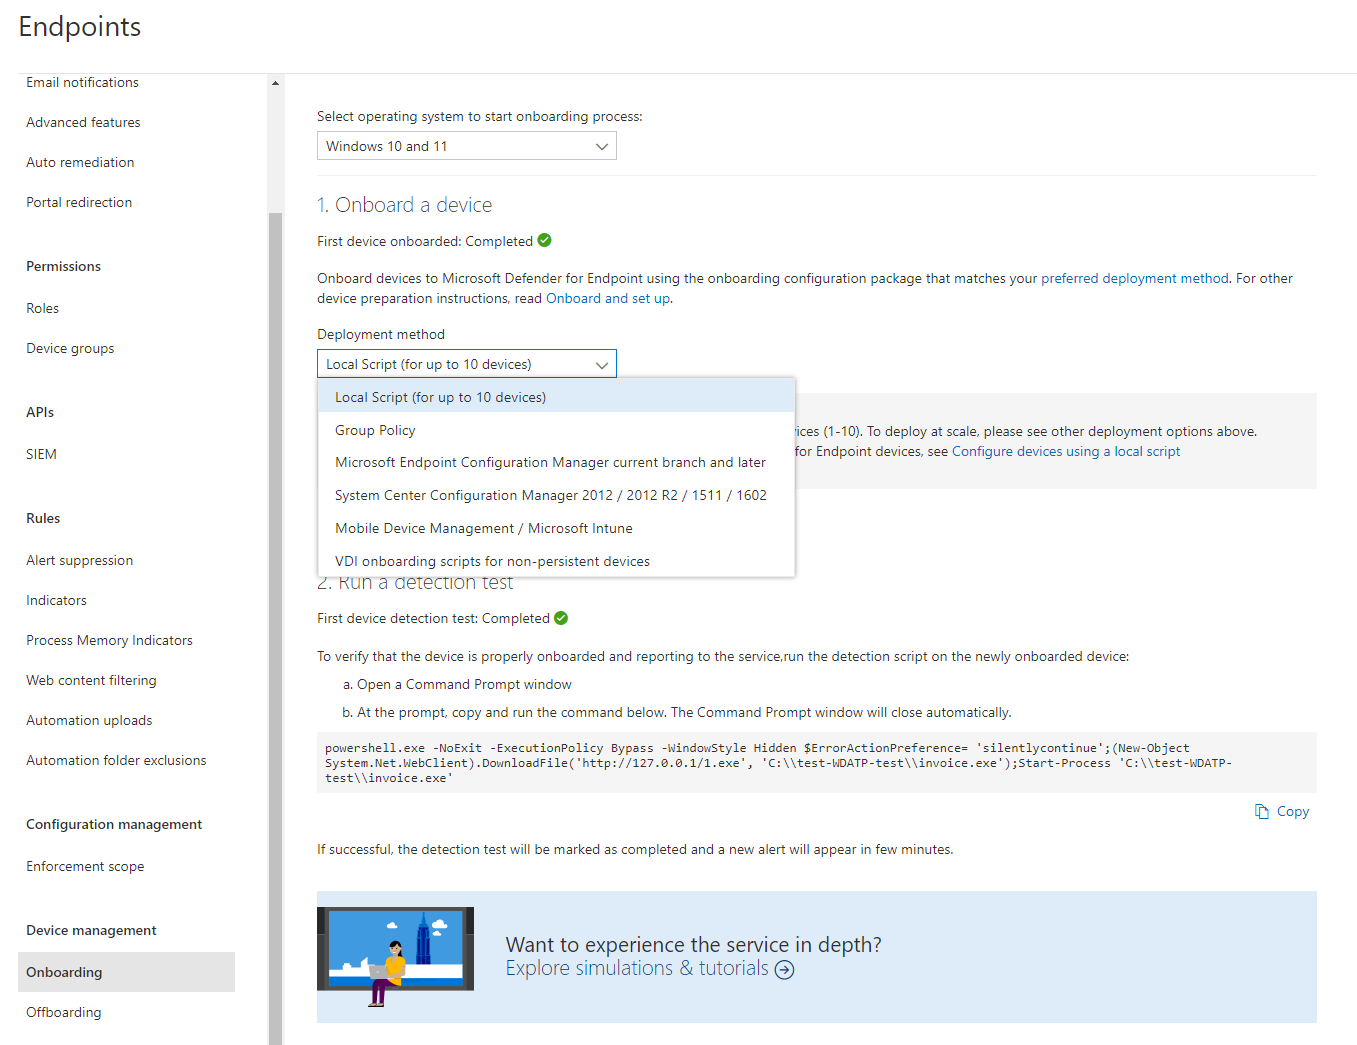
Onboarding
The onboarding process may be to most time consuming part of the deployment of DFE. I will write something about the most popular platforms:
-
Windows 10/11 devices
- Intune integration is the clearly the most convenient way
- On-premises it would be possible to:
- Integrate with SCCM
- Deploy a GPO
- For small deployments there is also a local script (CMD to run as local admin)
- VDI's whether persistent or non-persistent is possible with a Powershell script
-
Windows Server
- Server 1803/2019/2022
- Local script
- Group policy
- SCCM
- Server 2012 R2 and 2016 - needs an installation package to be run first and can then be onboarded through the onboarding package
- Server 2008 R2 SPI, 2012 R2 and 2016 (using Microsoft Monitoring Agent) - delivers data through the Microsoft Monitoring Agent. Here you need a Workspace ID and Workspace key to be configured. Both of them are displayed in the onboarding tab.
- Server 1803/2019/2022
Other operating systems like macOS, Linux Server, iOS and Android are also possible. I would like to reference you to the Microsoft docs for this concern.
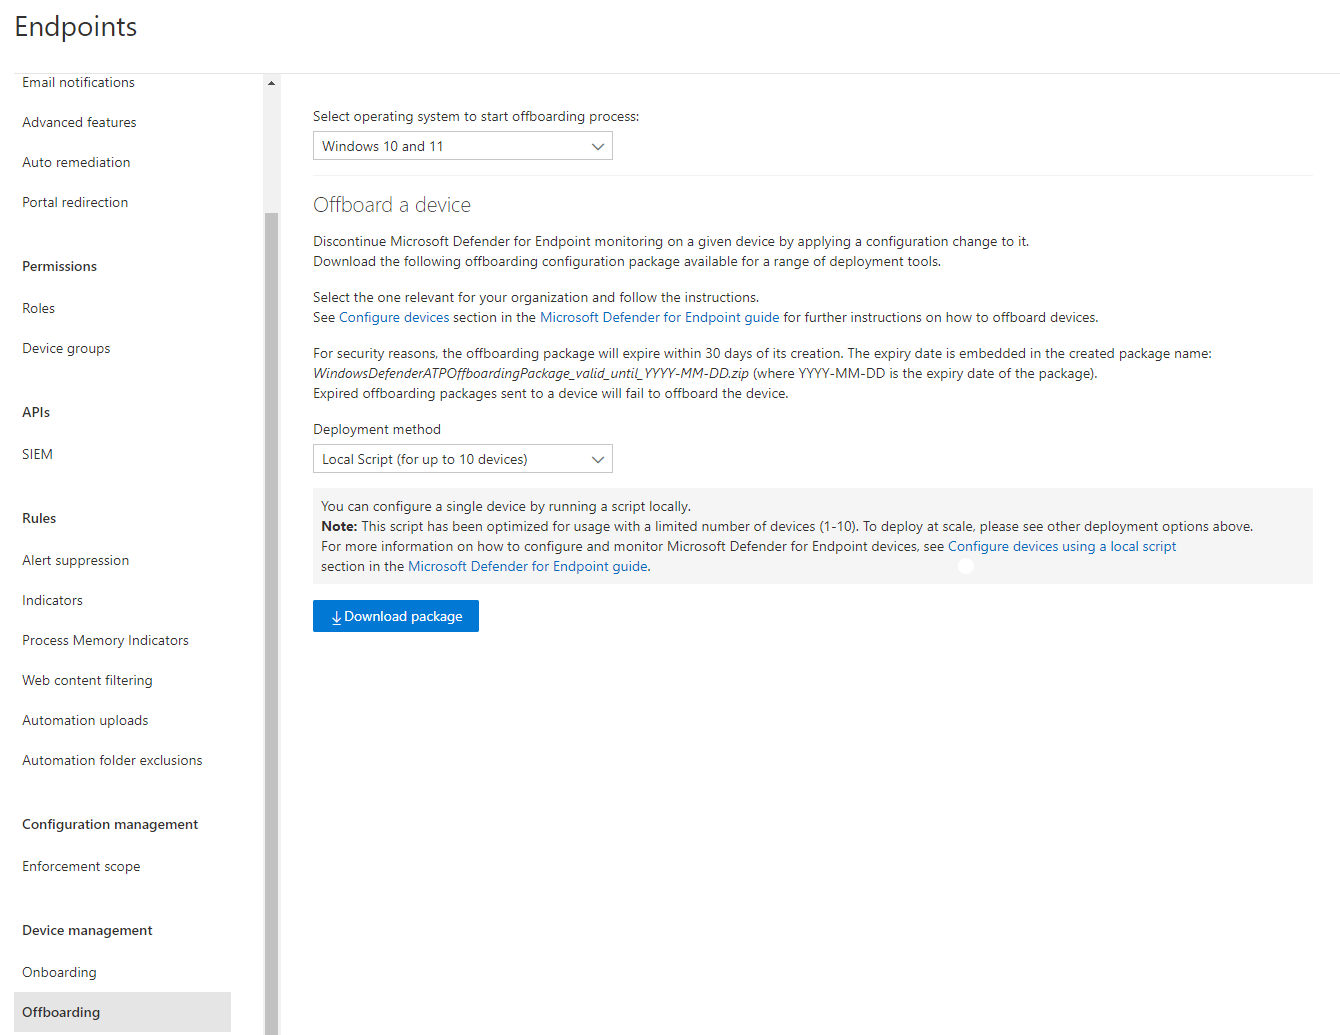
Offboarding
Offboarding has the same capabilities and limitations like onboarding, but obviously the other way around.
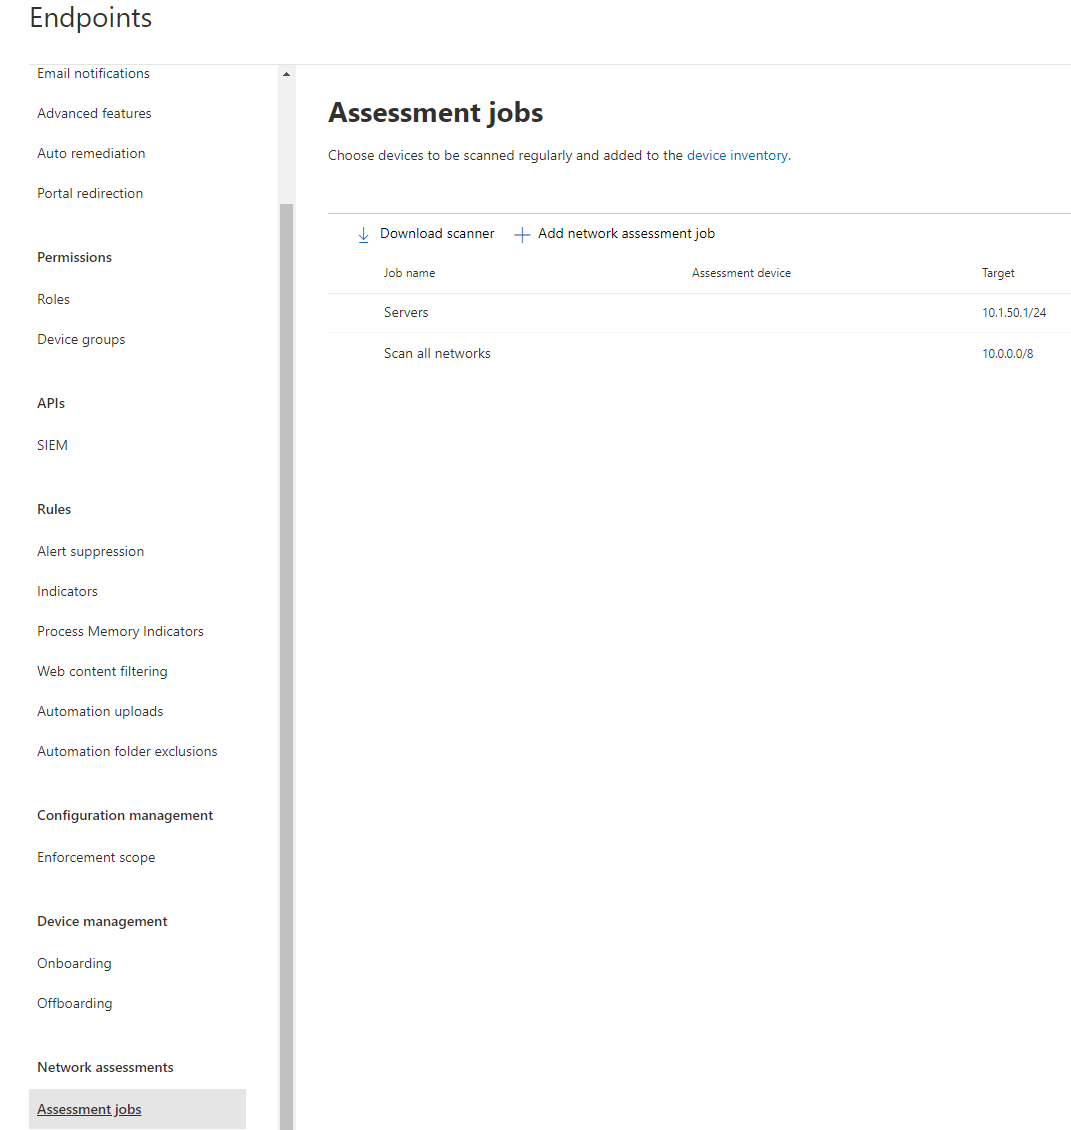
Assessment jobs
An assessment job is basically a network scanner. I can advocate utilizing that feature and have a scanning server in your environment for more data.
Onboarding types
When you are satisfied with the configurations, the next step is to onboard a device.
Checking the Intune connection
On the side of Intune we can also view some stuff. Go to Tenant administration>Connectors and tokens.
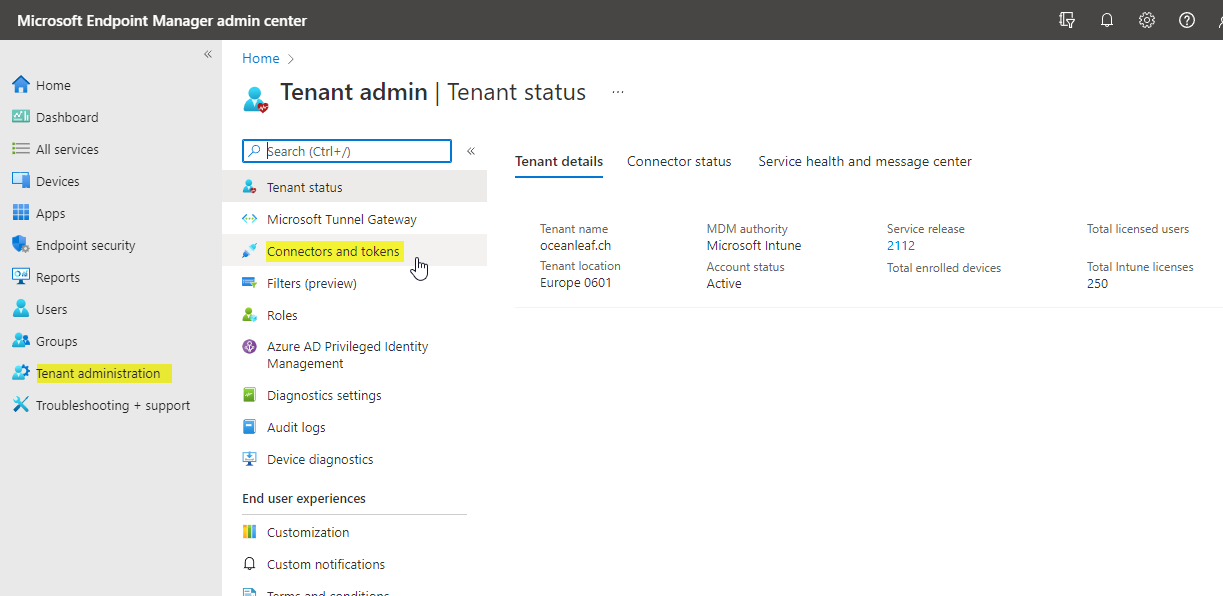
Then we have Microsoft Defender for Endpoint, where some more options are available. The first switch does enable supported agents to report status of profiles to Intune. Then there are few compliance policy settings and moreover app protection settings. All at the bottom there is a pie chart which shows how many Intune enrolled devices run the Microsoft Defender for Endpoint sensor.
Intune onboarding
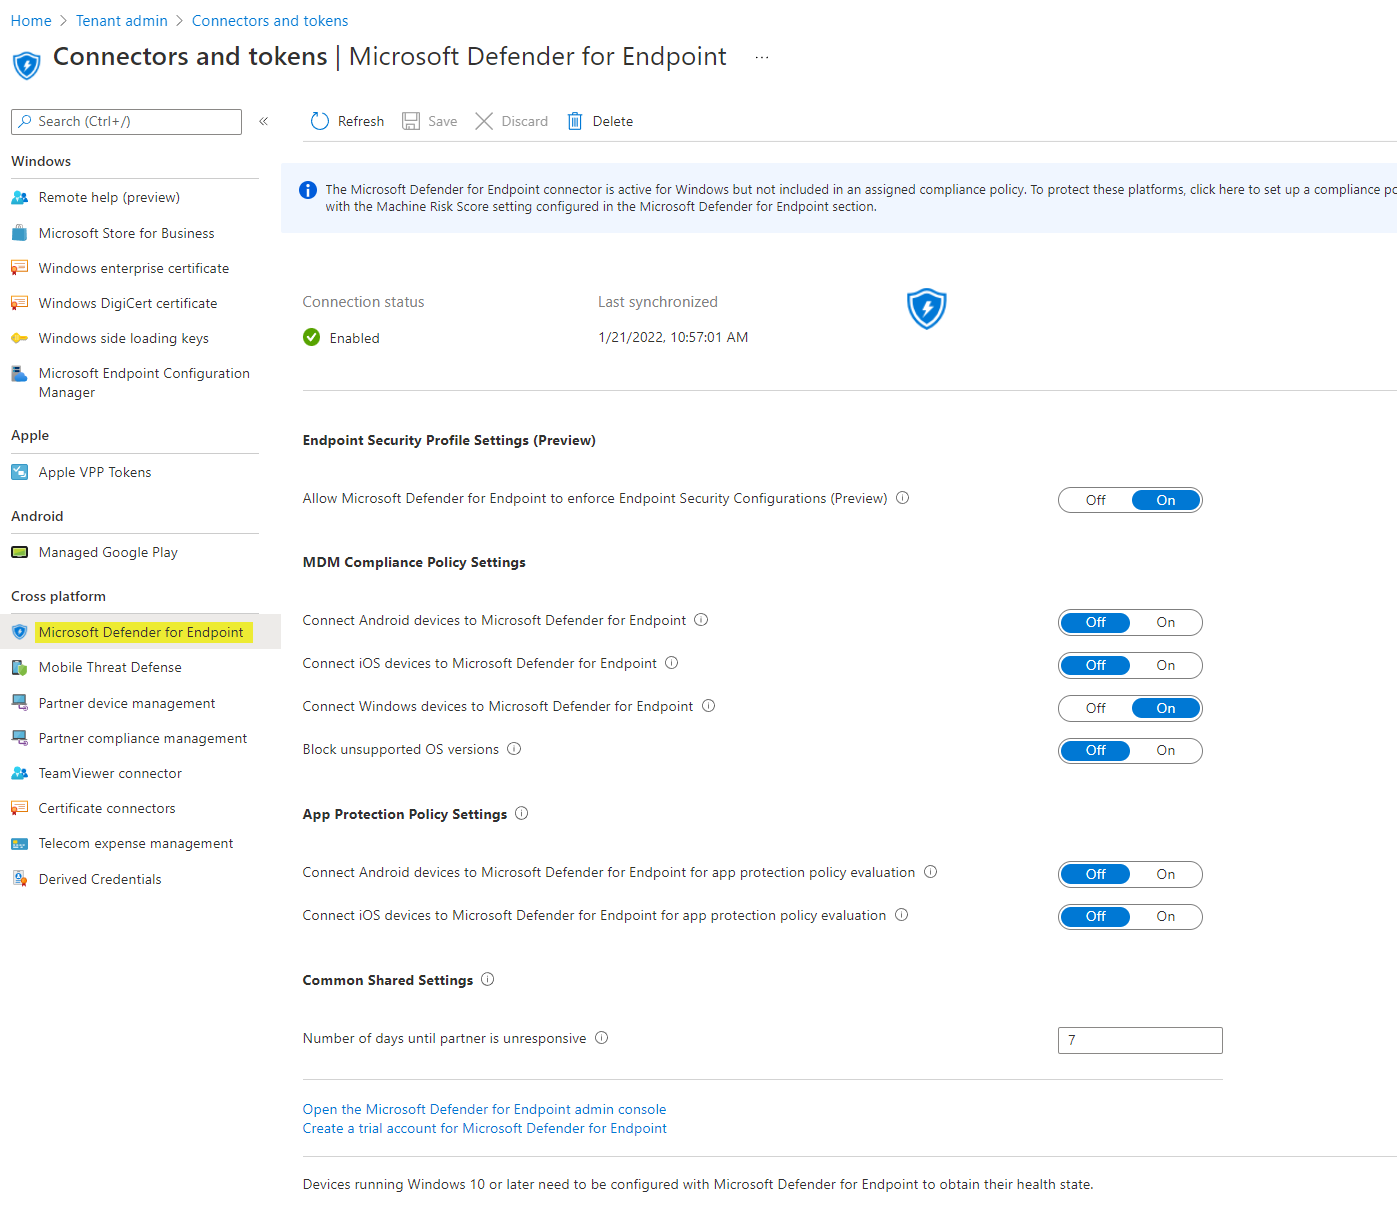
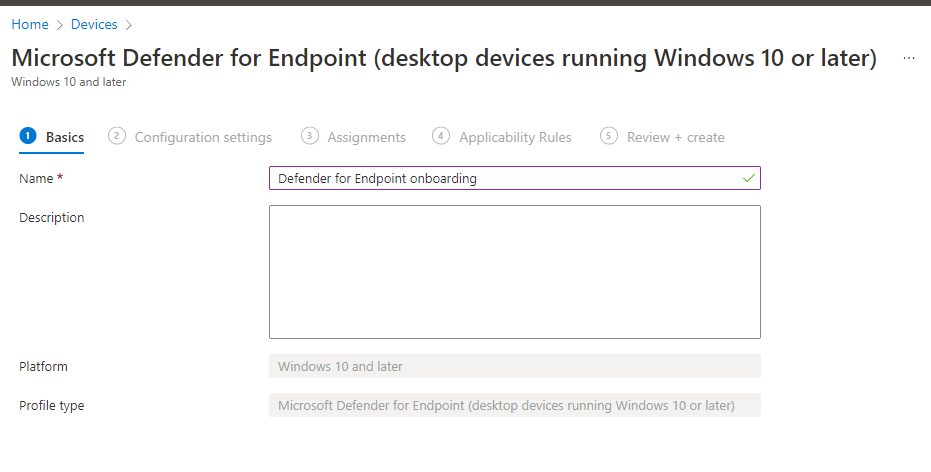
To onboard an Intune device, which is the Microsoft recommended default way, go to the Defender for Endpoint configurations, then onboarding and select Windows 10 / Windows 11 and Microsoft Endpoint Manager / Microsoft Intune:
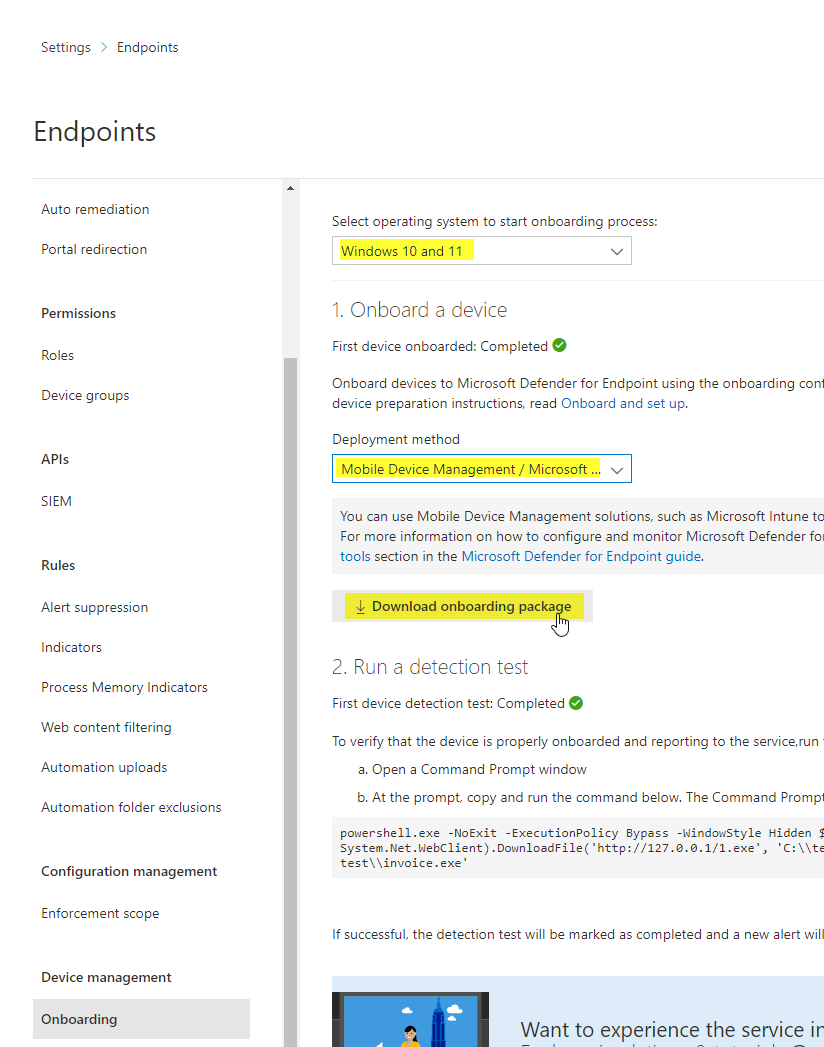
Now move to Microsoft Endpoint Manager, navigate to devices>Configuration profiles and create a profile. Choose Windows 10 and later and go for the template as profile type. From the list select: Microsoft Defender for Endpoint (desktop devices running Windows 10 or later)
Create that profile and give it an applicable name.
Next, you have to variants: either you do not need to upload the onboarding script, or you have to, as we did in the first step. This would look something like that:

Assign the profile to a user or a device, that has a corresponding license.
Conclusion
As you have seen, there is a wide range of configurations and associated thoughts to do. It's important to mention, that all the settings that are in this post are just a short look and mostly default set by Microsoft at this time. Every organization that is willing to use this product needs to have their hands on these configurations to construct their own security measures. Defender for Endpoint is made to extend and develop cloud-driven security for endpoint detection and as well response and offers suitable options to configure.
At this point I would suggest you to go on with the next posts that hold supplementary information: