Intune certificate deployment overview
Introduction
Authentication with certificates is considered as very secure and seamless for the user. Simply put, a Certificate Authority (CA) serves as the custodian of trust.
To establish their identity as trustworthy, devices and users can request a signed certificate from our CA, which they can then present to other services for authentication purposes such as connecting seamlessly to the corporate network. Read more:
 Niklas Tinner
With Intune we currently have two native approaches for certificate deployment to our devices where the purpose is client authentication:
- PKCS
- SCEP/NDES
Note that there is also the Imported PKCS functionality which is commonly used for other use cases such as S/MIME.
I also want to mention a third-party solution SCEPman which is a Cloud certificate authority and SCEP software as a service with no need for on-premises infrastructure.
Key points
- Cross-platform (OS) support to deploy certificates
- Use certificates to seamless and automatically authenticate with services (client authentication e.g. used for Wifi, VPN)
- Integration with your on-premises issuing CA/Public Key Infrastrucutre (PKI)
- Communication between your CA and the Intune service through Intune Certificate Connector
- User or device certificates with configurable certificate request settings
Comparison
PKCS
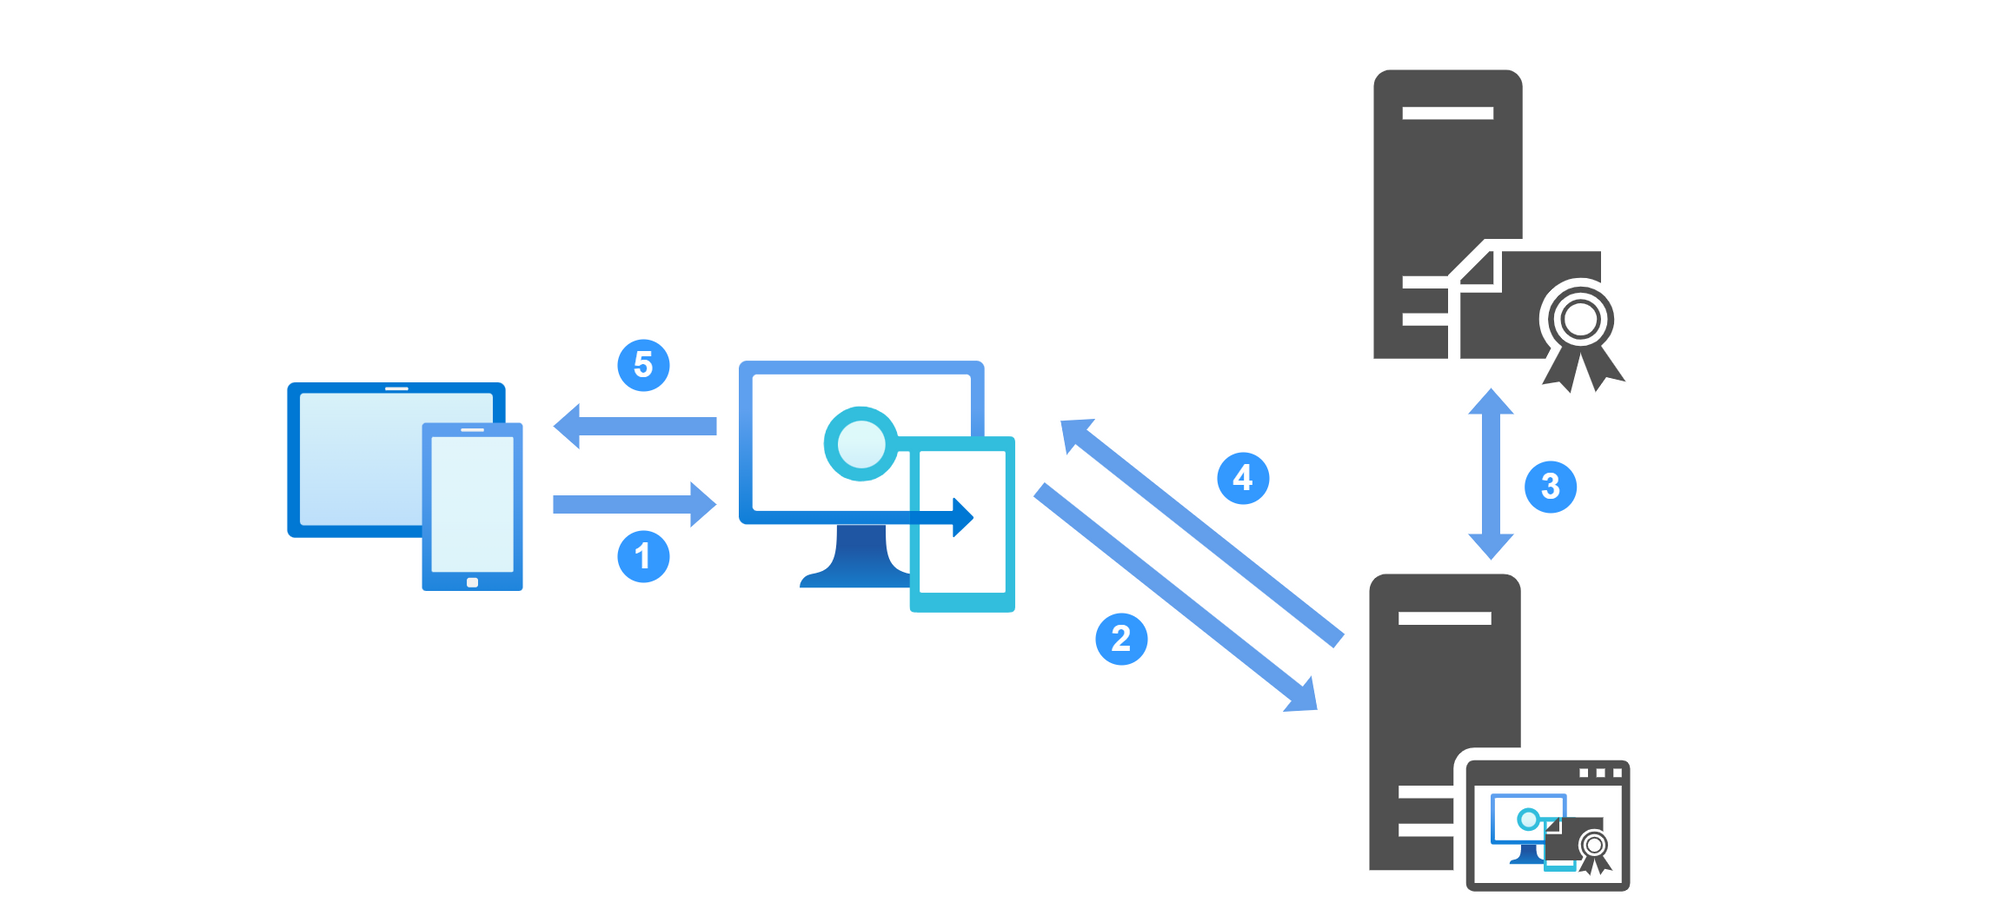
- A device contacts Intune for a certificate.
- Intune will forward the request to Intune Certificate Connector
- The connector server creates the public + private key and sends it to the CA.
- Certificate Connector sends the signed certificate back to Intune.
- Intune forwards the certificate to the device.
Components
- Intune
- PKI
- Windows Server with Intune Certificate Connector
SCEP/NDES
A device forms a request and generates a public + private key. The NDES (web)server is externally published. It receives the request and lets the NDES policy module verify the request in combination with the Intune Certificate Connector. If it was verified the NDES will contact the CA to sign and issue the public certificate.
Components
- Intune
- PKI, commonly the issuing CA (also known as subordinate CA)
- Windows Server with role NDES and IIS installed + Intune Certificate Connector
- Reverse/Web proxy (Azure AD Application Proxy)
If you want to learn more about SCEP, I have already written a detailed blog post about it:
Niklas Tinner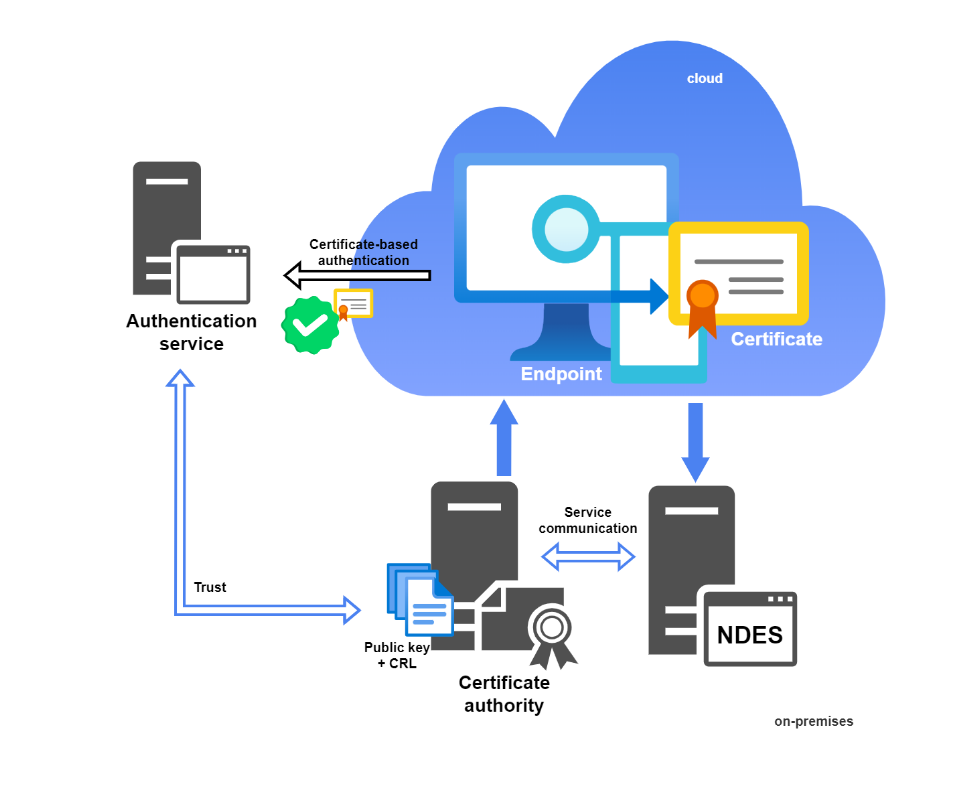
Recommendation
My current recommendation is to implement PKCS. It is way simpler in implementation and operation. Additionally it offers less attack surface because the only on-premises component exposed to the Internet is the Intune Certificate Connector.
The difference to SCEP/NDES is that the private key is in transit, but the device only needs to speak to Intune and not internal servers.
PKCS
To setup PKCS we need four parts:
- Certificate template on issuing CA
- Certificate authority settings
- Intune Certificate Connector
- Intune profiles
Certificate template on issuing CA
First, we need to create a new certificate template on the issuing CA.
- Open cert.srv, expand the Issuing CA and select Certificate Templates
- Right click on it and choose Manage
- Duplicate the User template
- Configure the new template with these settings:
- General: Name = IntunePKCS, Validity default, uncheck Publish certificate in Active Directory
- Compatibility: rise to the highest for both authority and recipient
- Request Handling: default, verify enabled Allow private key to be exported
- Extensions: Configure Application Policies to Client Authentication only
- Security: Add the server/computer object of the Intune Certificate Server for read and enroll allow permissions and verify that no other unwanted identities are added here (usually only Authenicated Users, Administrator, Domain Admins and Enterprise Admins)
- Subject Name: Choose Supply in the requst
Microsoft guide
- On the Certificate Templates, right click>New>Certificate Template to Issue, choose the one created before (IntunePKCS)
Certificate authority settings
- Open the properties of your CA
- In Security, add the server/computer object of the Intune Certificate Server for Issue and Manage Certificates and Request Certificates (generally it is very important that this security list is configured for the right identities)
- In Certificate Managers, Restrict certificate managers and allow the Intune Connector server to only have access to the IntunePKCS template
Intune Certificate Connector
- Install the Intune Certificate Connector on a dedicated, tier 0 sever which can communicate with the issuing CA. (Downloadable through the Intune admin center>Tenant administration>Connectors and tokens>Certificate connectors)
- Configure it with:
- Private and public key pair (PKCS) certificates
- Certificate revocation
- Choose SYSTEM as service account (recommended)
- Sign in with an Intune or Global admin that has an Intune license assigned
- Verify Autoupdate for the connector
Intune profiles
Trusted certificates
Device configuration profile, template, Trusted certificate
To import the trusted root (or intermediate) certificate from your Certification Authority and assign it to devices that use PCKS certificates to authenticate with your org's resources.
It is crucial, that all certificates from the trust chains are imported on the device.
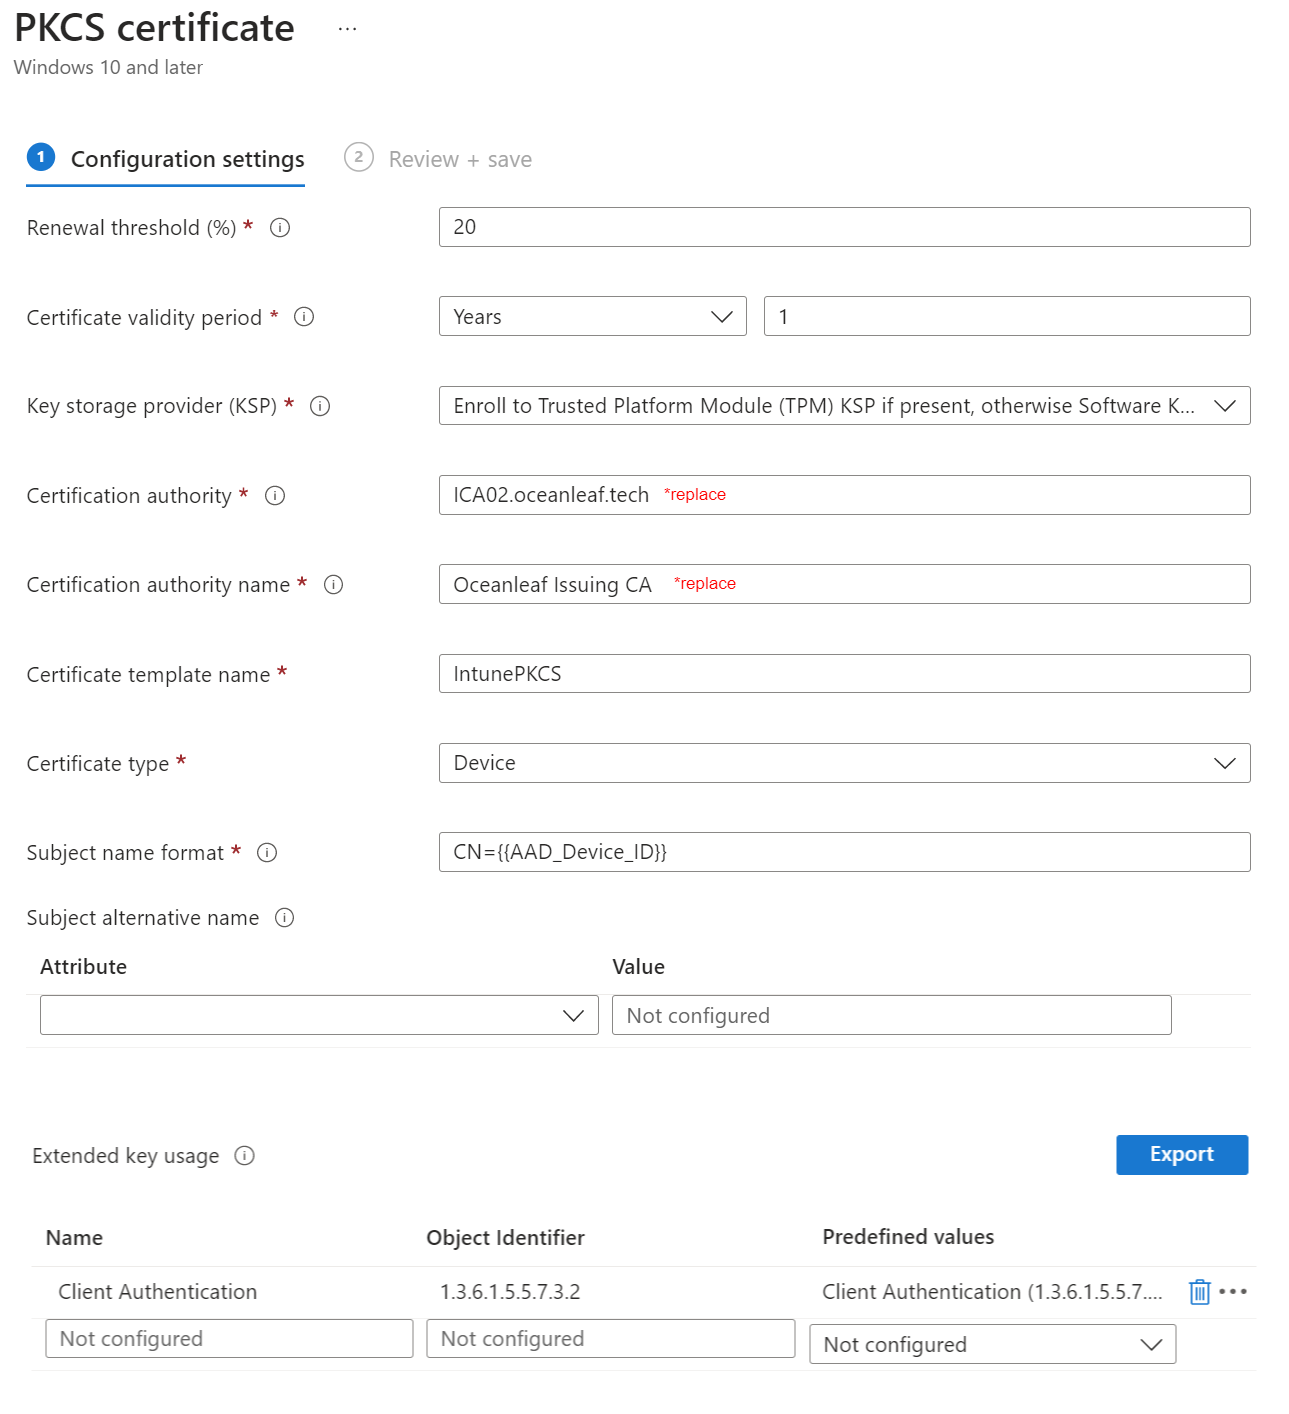
PKCS certificate
Device configuration profile, template, PKCS certificate
And configure it with the following settings. Important:
- Certificate authority and name can be found out, when running "Certutil -config - -ping" on the CA
- Template name is found in the certificate template
- Subject name and alternative name formats can be found here
Troubleshooting
In case of encountering issues, please doublecheck the configuration above and try to identify the issue. I would check in this order: Intune profile -> Intune Certificate Connector -> Certificate Authority -> Client.
Intune Certificate Connector
Event logs are found under Application and Services Logs>Microsoft Intune Connector
Lookup Event IDs and descriptions
Also check if the connector is healthy from the Intune admin center, where you downloaded the connector install file.
Certificate Authority
Check if the certificate gets requested in certsrv.msc under issued or failed certificate requests.
It is important, that the Intune Certificate Connector server and the CA can communicate, verify that. (ping, Firewall)
Optionally, enable advanced auditing on the CA.
Client
Verify if the client has any personal certificates, issued by your CA.
Also generally have a look at the event viewer location: Applications and Services Logs>Microsoft>Windows>DeviceManagement-Enterprise-Diagnostics-Provider
Niklas Tinner